
Introduction of Dell Boomi Platform
There are many integration tools available in the market. Dell Boomi AtomSphere is an on-demand multi-tenant cloud integration platform for connecting cloud and on-premise applications and its data. Dell Boomi makes it possible to integrate applications, data directly from the web by using a visual designer with access to a library of integration of components.
Dell Boomi Platform is an iPaas software. The Platform enables customers to design cloud-based processes called Atoms and transfer data between cloud and on-premise applications. It has more than 125 out of the box connectors for connecting different apps. Boomi specializes in Integration, API Management, Master Data Management, and data preparation.
The, blogs will explain how to create, deploy a Web Service using the Dell Boomi Platform. Steps involved in setting up API and Gateway, External Broker configuration, and testing of the Web Service.
A Web Service is a client-server application or application component for communication between two devices over a network. Considered a use case where the Client sends a request to a Service where it is exposed via API Gateway. The request will be authenticated before reaching Service to get a response for the Client request.
Different steps involved in this use case are:
- Develop a Web Service
- Deploy Web Service application
- API Management to expose Web Service
- Modify Shared Web Server Authentication Type
- Test Service using Boomi API Swagger
- Configure Gateway using API Key
- Create a plan for controlling client requests
- Create an Application and Subscription
- Test Web Service using API Key
- Configure External Broker as Gateway
- Test Web Service for External Broker Authentication
Below is a step by step procedure for building/developing a RESTful Web Service in the Boomi Platform.
1. Create sample XML request file Employee_request.xml and response file Employee_response.xml in a text editor.
Add the following text to the Employee_request.xml file <Employee> <Id>123</Id> </Employee>
Add the following text to the Employee_response.xml file <Employee_Details> <Emp_Id>123</Emp_Id> <First_Name>Smith</First_Name> <Last_Name>Jones</Last_Name> <Salary>900000</Salary> </Employee_Details>
2. Login to https://platform.boomi.com
3. Create a folder Employee under your root folder in the component explorer.
4. Create a Xml profile for input. Click on the down arrow prefixed to Employee folder and select New Component

5. A Create Component dialog window appears.
Select the Type – Profile.
Enter the component name – Employee_request
Profile Format – XML Click Create.

6. Click on the Import button.
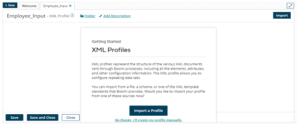
7. A XML import wizard appears.
8. Click Choose a file. Select the Employee_request.xml file that was created in step -1. Click Next. It will load the profile. Click Finish.
9. The Employee_request XML Profile will be loaded, choose Data Type as Number for element Id.
Click Save and Close
10. Repeat steps 4-9 for the XML output profile.
Please enter the following values in the Create Component dialog window appears.
Select the Type – Profile.
Enter the component name – Employee_response
Profile Format – XML
Import Employee_response.xml file in the JSON import wizard.
The Employee_response profile will be loaded. Choose Data_Type as Number for Emp_Id & Salary.
Click Save and Close.

11. Create a Component of type Connection and choose connector as Database. Click on the down arrow prefixed to Employee folder and select New Component

Select the Driver Type – Oracle.
Enter the User Name – xxxxxx
Password – xxxxxxx
Host – localhost
Port – 1521
Database Name – orcl
Click Test Connection and choose localAtom and click on Next.

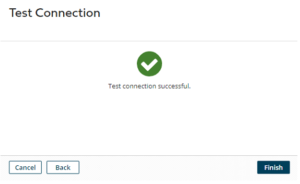
Note: To get connection successful, place the oracle jar in the below local atom location.
C:\Boomi AtomSphere\localAtom\Boomi AtomSphere\lib on your machine.
12. Create a Table in Oracle Database with below fields, using SQL developer
CREATE TABLE EMPLOYEE (EMP_ID NUMBER (10), FIRST_NAME VARCHAR2(20), LAST_NAME VARCHAR2(20), SALARY NUMBER (10), PRIMARY KEY (EMP_ID));
Insert a record with details mentioned below
INSERT INTO EMPLOYEE (EMP_ID, FIRST_NAME, LAST_NAME, SALARY) VALUES (123,’Smith’,’Jones’,900000).
13. Create a Map Component to map the input request values to the output response. Click on the down arrow prefixed to Employee folder and select New Component
A Create Component dialog window appears. Select the Type – Map.
Enter the component name – Map_Id
Click Create.

The Map_Id Component gets loaded. Click on Choose to select the source XML Input profile Employee_request for the map

Choose a Profile dialog window appears. Select the profile from the folder gets displayed in the Profiles display. Expand the Employee folder and select Employee_request profile. Click Ok.

Choose the profile Employee_response on destination profile of the Map_Id. Click on the  to add a Map function.
Add a function dialog window appears. Click on the Category dropdown and select Lookup. Select Functions – SQL Lookup. Click Ok.

Edit Sql Query as SELECT EMP_ID, FIRST_NAME, LAST_NAME, SALARY FROM EMPLOYEE WHERE EMP_ID=?
Add
AA Input
EMP_ID(Integer)
Add Output
EMP_ID(Integer)
FIRST_NAME(Character)
LAST_NAME(Character)
SALARY(Integer)
Click on Ok.

Map Employee_Input to EMP_ID and Output elements to Employee_Output as below

Click Save and Close
14. Click on ![]() to create an Employee_Details process component. A Create Component dialog appears. Select Type – Process. Component Name Employee_Details. Click Create.
to create an Employee_Details process component. A Create Component dialog appears. Select Type – Process. Component Name Employee_Details. Click Create.

15. A Start Shape window appears. Select Connector – Web Services Server. Click on in the Operation text field.

Enter the following and Click Save and Close.
OperationName – Employee Details Operation
Operation Type – EXECUTE
Object – employee_details
Expected Input Type – Single XML Object
Request Profile – Employee_request
Response Output Type – Single XML Object
Response Profile – Employee_response
Result Content Type – application/xml

Click Save and Close
16. Drag Map_Id onto the canvas next to Start Shape. that was created in Step 13. Click Save
17. Connect Start shape to the Map shape by dragging ![]() from Start shape onto the
from Start shape onto the

Map_Id shape. The red arrow turns into a green arrow confirming that the Start shape is connected to the Map shape. Click Save
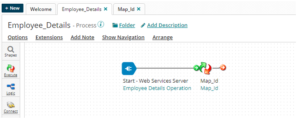
18. Drag the Return Documents shape from logic shapes onto the canvas next to the Map_Id shape. Click Ok. Connect Map_Id Shape to the Return Documents Shape. Click Save and Close.

After developing a process, it is required to package and deploy it in an environment.
Below is a step by step procedure for deploying a process in the Dell Boomi Platform.
1. Setup a Local Atom on windows in a TEST environment and verify that it is up and running.
Navigate to Manage -> Atom Management
Click on local atom that you have created (PS-HYD-LP-006 is the local atom that I have created for my testing) and verify that the status of the local atom is online.

2. Open the Employee_Details Process in the process editor and click on Create Packaged Component

3. Select Employee_Details process and click on Next: Add Details.

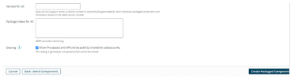
4. Mention version and enable Sharing and click on Create Packaged Components
5. Click on Deploy

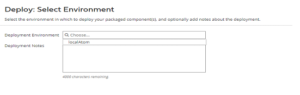
6. Select Environment and click on Next: Select Version.
7. Click on Next: Review Details.
8. Review Deployment and click on Deploy.

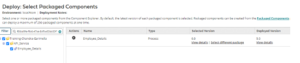
9. Deployment Successful, click on View Deployments to see the deployed process.

10. Employee_Details process deployed successfully.

In Blog 2, will discuss on changes required on Web Service to expose it as API. It consists of creating a REST endpoint for Web Service, Shared Web Server configuration for authentication purposes. The last section of it will explain the usage of Swagger Utility to test the API service.