- Overview
- Installation Steps
- Demo API
- Add the connector into Studio
- Create a connection
- Conclusion
| MongoDB | SQL | |
| Priority Data Structure Data Representation JOIN Support Query Language Schema Developer Productivity Atomic Transactions (e.g., having several operations within a transaction) | Cloud-friendly Unstructured, or structured data that will potentially grow fast JSON documents No JavaScript No need to define Fast Doesn’t fully support all operations but supports multi-document transactions | High data security Structured Tables and rows Yes Structured Query Language (SQL) Must define columns and tables Slow Supports atomic transactions |
A Step-by-Step Guide to Install MongoDB on Windows:
Step 1: Go to the Official https://www.mongodb.com/try/download/community Step 2: Navigate to Products > Community Edition Step 3: Select the appropriate installer file from the dropdown menus on the Community Edition page. In the version dropdown, select the latest version, 6.0.1(current) In the Platform dropdown, select Windows In the Package dropdown, select msi Step 4: Click the “Download” button. After the installer file has been downloaded, it’s time to run the installer file. Step: 5: Go to the downloaded directory in your system. Step 6: Double-click on the .msi file. It will open the MongoDB setup windows. Step 7: It will open the MongoDB Community Edition installation wizard. This setup wizard guides
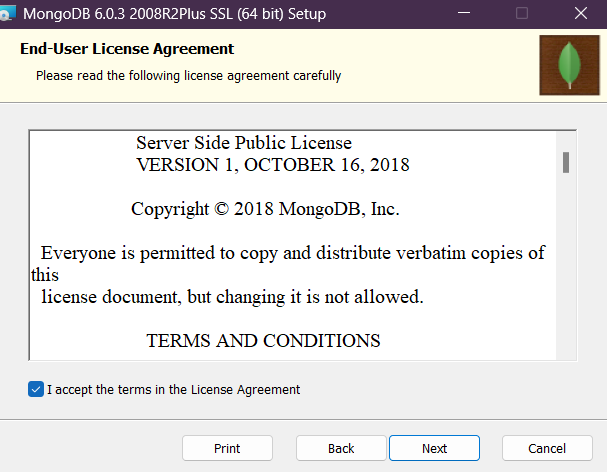 Step 8: Accept the terms and conditions, and then click the “Next” button to continue.
 Step 9: Next, you can choose either the Complete setup or Custom setup type to proceed. But for a beginner, we’d recommend using the Complete setup option. It installs MongoDB in the default location. Select the Complete setup, and click “Next.”
 Step 10: Select the “Install MongoD as a Service” option on the next page. Keep all other parameters as default. Click on the “Next” button.
 Step 11: In the “Ready to install MongoDB” page, click the “Install” button, give administrator access, and wait for the installation to finish. Once installation is complete, you can click on the “Finish” button to finalize your installation.
Step 12: After installation need to set up Environment Variable
Go to the MongoDB installation directory in the “C Drive.” Navigate to Server > 6.0 > bin folder. Copy the path.
C:\Program Files\MongoDB\Server\6.0\bin
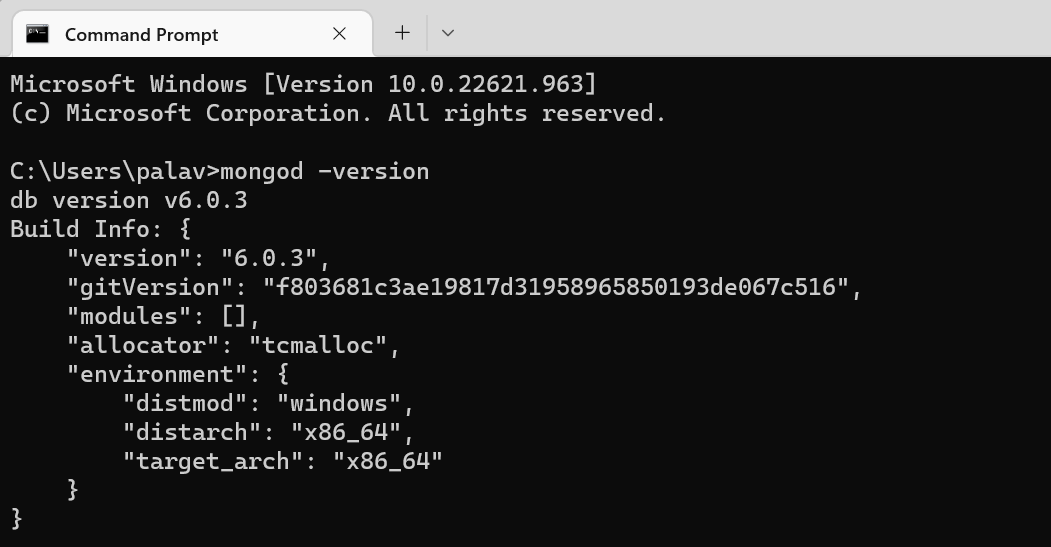
Step 13: After adding the environment variable in the system , we can check mongodb installed or not in cmd , you can run the mongod –-version command on the Command window to check if MongoDB is installed correctly.
Step 11: In the “Ready to install MongoDB” page, click the “Install” button, give administrator access, and wait for the installation to finish. Once installation is complete, you can click on the “Finish” button to finalize your installation.
Step 12: After installation need to set up Environment Variable
Go to the MongoDB installation directory in the “C Drive.” Navigate to Server > 6.0 > bin folder. Copy the path.
C:\Program Files\MongoDB\Server\6.0\bin
Step 13: After adding the environment variable in the system , we can check mongodb installed or not in cmd , you can run the mongod –-version command on the Command window to check if MongoDB is installed correctly.
 Open mongodb application it will show like this
 We can connect or create database here.
Open Anypoint studio add Mongodb modules from exchange.
We can connect or create database here.
Open Anypoint studio add Mongodb modules from exchange.
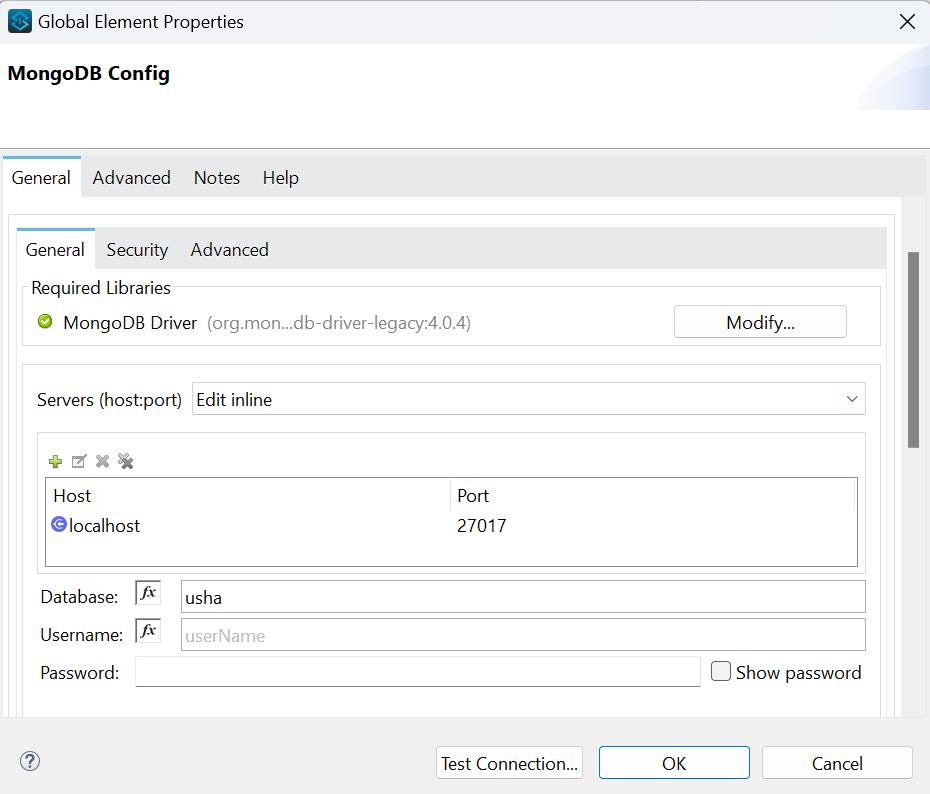
 Give host , port and database to connect mongodb configuration.
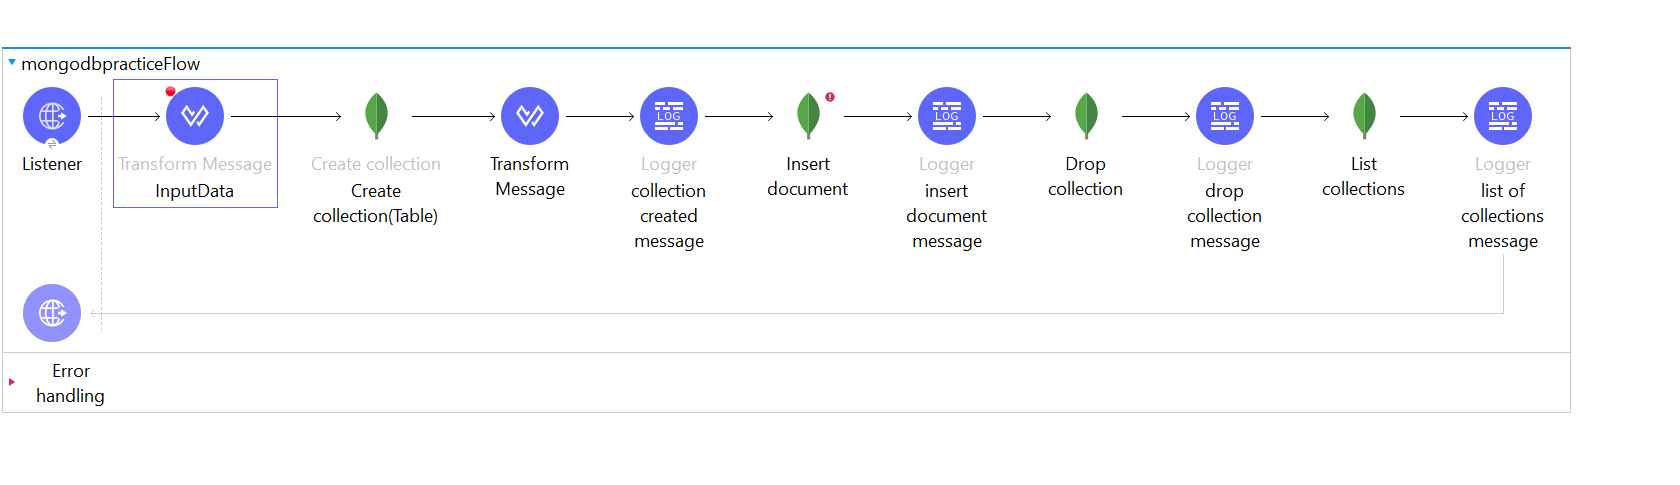
- Here I created one application using Mongo database connectors.
- MongoDB connectors required in this POC
Creates a new collection. If the collection already exists, a MongoException will be thrown.
Collection means it create new table in mongodb
Insert document:Inserts a document in a collection
Drop Collection Deletes a collection and all the objects it contains. If the collection does not exist, does nothing. List Collection Lists names of collections available at this database
- Here post method is used to insert data into the mongo database and gave input data through postman

- Store that payload into variables i.e., inpuData and collectionName to create collection and insert data into it.

- After creating collection in mongo database insert document into mongo db

- Next drop collection is used to remove particular collection
- List collection is used for fetching the list of collection in mongo database

- Here we are getting list of collections

- Successfully inserted data into mongo database